


Signing the letter of intent or the purchase agreement for a digital asset is not the end of the journey; it is the beginning of its most delicate phase: the transfer of ownership. For a micro-SaaS developer or a content creator, this technical transition phase is packed with hidden traps. A database misconfiguration, a poorly redirected domain, or a security flag triggered during a social account handover can wipe out months of effort, trigger user churn, or push the buyer to cancel the transaction entirely.
This operational guide is designed to give you the exact roadmap for a seamless transfer. The goal is simple: hand over the keys securely, maintain 100% service uptime for your users or subscribers, and complete the transition without spending a single penny on useless transfer fees.
The Digital Asset Transfer Matrix
Each type of digital asset comes with its own set of transfer challenges. While a SaaS requires migrating server infrastructures and financial pipelines, a media asset (YouTube, TikTok) depends on highly strict, platform-specific security protocols. The table below outlines the core focus points of each transfer type:
| Asset Type | Key Components to Transfer | Major Downtime Risk | Average Transition Time |
|---|---|---|---|
| Micro-SaaS | Source code, Database, APIs, DNS, Stripe/Payment Gateway. | API downtime, loss of active subscription tokens (churn). | 3 to 7 days |
| YouTube Channel | Google Brand Account, monetization history, AdSense linking. | Temporary de-indexing, Google security lockouts, demonetization. | 7 days (strict Google security constraint) |
| TikTok Account | Credentials, recovery phone/email, agency/ads manager access. | Shadowban due to abrupt IP location change, loss of Creator Fund access. | 24 to 48 hours |
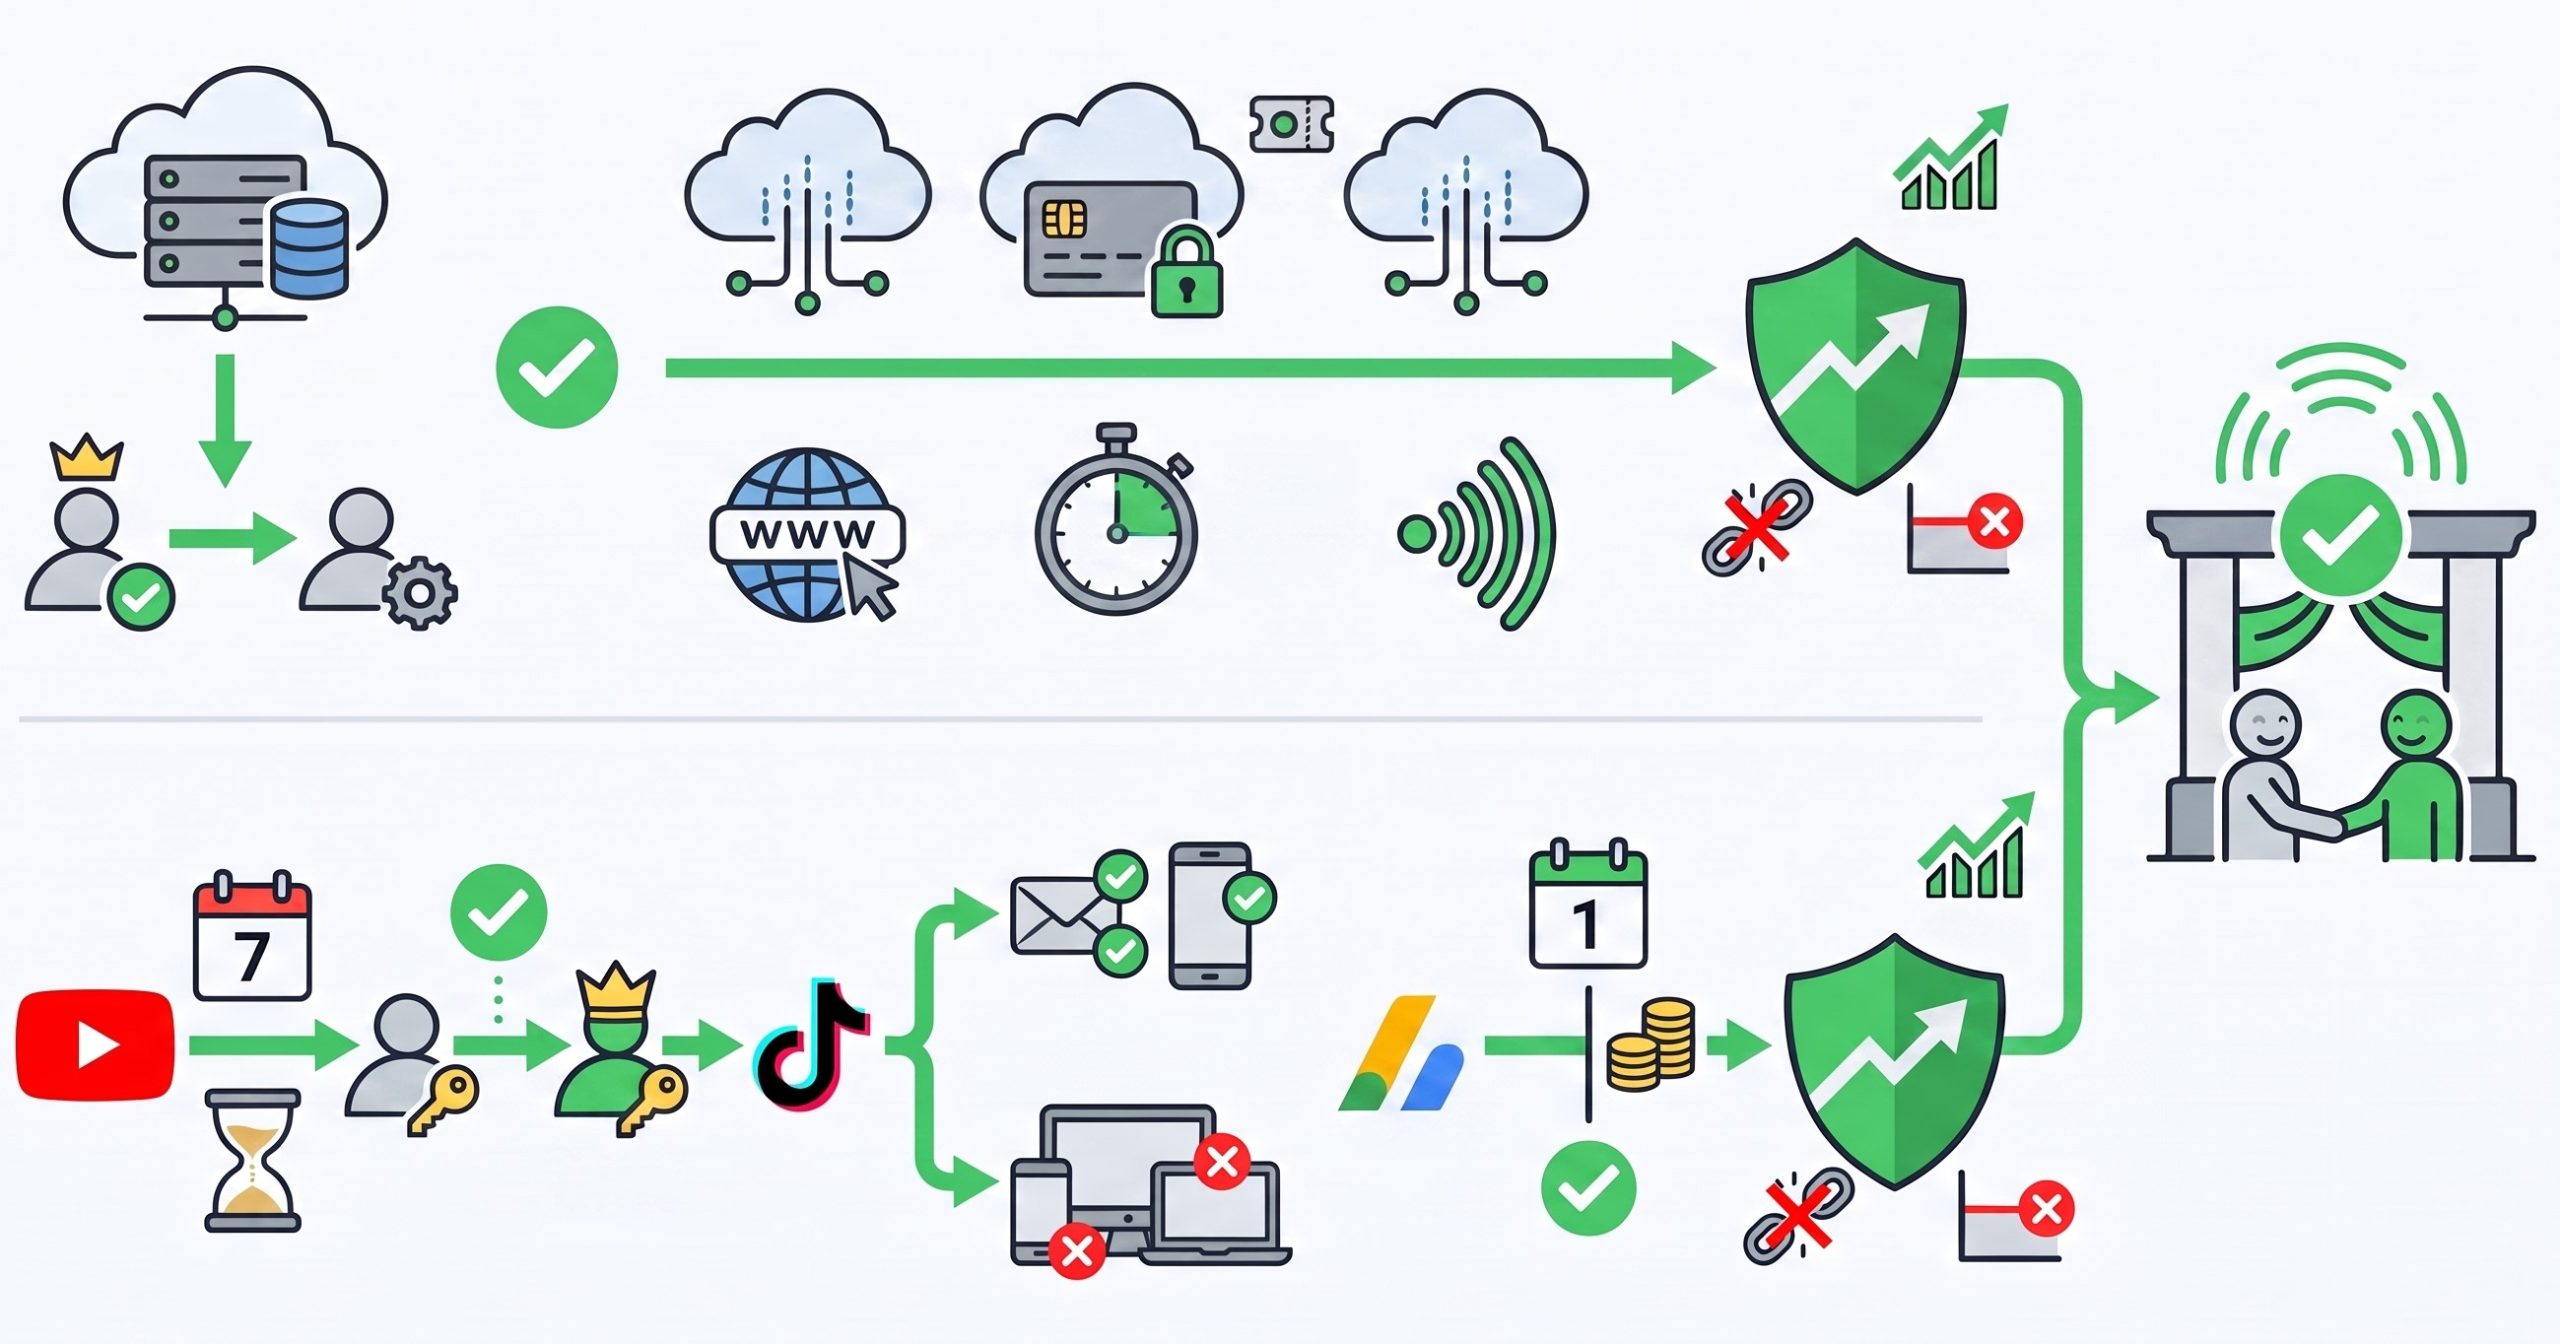
Part 1: Transferring a Micro-SaaS Without Losing a Single User
Migrating a Software-as-a-Service (SaaS) is a high-wire act. The secret to a successful migration lies in avoiding any service interruption (downtime) and preventing any break in the subscription billing loop.
Seamless Database and Hosting Migration
To avoid service downtime, the golden rule is simple: never attempt to physically migrate databases or servers from one hosting provider to another during the sale if you can avoid it. Instead, prioritize transferring ownership of the existing infrastructure accounts (Vercel, Supabase, Render, AWS).
- Organization Ownership Transfer: Most modern cloud and hosting providers allow you to create an “Organization,” invite the buyer as an Administrator, and then step down as owner. This is the cleanest method and guarantees 100% uptime.
- Hot Database Migration: If you absolutely must move data to the buyer’s separate servers, set your original database to “read-only” mode while copying data to the new destination. This prevents users from writing new data (like signing up or updating settings) that would be permanently lost during the traffic switch.
Handling Stripe Transitions and Active Subscriptions
This is where the buyer’s return on investment is secured. If you lose customer card tokens during the payment migration, customers will have to re-enter their credit card details. This inevitably triggers a catastrophic churn rate.
- Scenario A: The Stripe account is dedicated entirely to the SaaS. This is the ideal setup. Go to your Stripe account settings, add the buyer’s email address as the Primary Owner (Administrator), and remove your own access once the buyer has updated the bank payout details.
- Scenario B: The Stripe account manages multiple projects. You must request an official account-to-account data migration through Stripe Support. You will need to provide Stripe with both your source account ID and the buyer’s target account ID. Stripe will securely migrate the customer records and saved credit card tokens in the background with zero disruption to active billing cycles.
The DNS Cutover
DNS propagation can take up to 24 or 48 hours. To minimize this window, lower the TTL (Time-To-Live) value of your DNS records to 300 seconds (5 minutes) at least 24 hours before pointing the domain to the buyer’s new server IP. Once the switch is successfully completed and verified, restore the TTL to its default value (usually 86400 seconds or 24 hours).
Part 2: The Strict Protocol of YouTube Channel Handover
Handing over a faceless YouTube Cash Cow channel is heavily regulated by Google’s automated security systems. Skipping steps or trying to rush the process can flag the transaction as suspicious and lead to a locked account.
The Absolute Rule of the “Brand Account”
You should never sell or hand over your personal Google account (primary Gmail address). To safely transfer a YouTube channel, it must be linked to a Google Brand Account.
- If your channel is not already linked, move your channel to a Brand Account through YouTube’s advanced settings.
- Go to your Google Brand Account settings page and click “Manage Permissions.”
- Invite the buyer’s professional Google account as an “Owner”.
- The 7-Day Security Rule: Google enforces a strict, unskippable 7-day waiting period. During this time, the buyer remains a secondary owner and cannot remove your access.
- On the 8th day, log in and change the buyer’s role to “Primary Owner”. The buyer now has full control and can safely revoke your access.
Transitioning AdSense and Monetization
The channel must be unlinked from your personal AdSense account and linked to the buyer’s AdSense account. This process must be initiated directly from the “Earn” tab in YouTube Studio. Once the buyer links their approved AdSense account, Google typically takes 24 to 48 hours to approve the change. Plan this switch in the middle of the month to avoid disrupting payout cycles.
Part 3: Securing a TikTok Account Handover
TikTok is highly sensitive to rapid geographical changes and sudden edits to account credentials. These triggers can result in automated shadowbans (where your videos stop being served to the For You page) or security lockouts.
The “Soft Transition” Step-by-Step Method
To prevent TikTok’s fraud detection algorithms from flagging the account transfer as a hack, use this step-by-step protocol:
- Step 1: Ask the buyer to provide a dedicated, clean phone number and email address that have never been linked to any TikTok account.
- Step 2: From your TikTok mobile app, update the account email address to the buyer’s new email first. Verify the security code sent to your original email address.
- Step 3: Update the recovery phone number. The buyer must instantly send you the SMS verification code they receive to complete the link.
- Step 4: Go to your account security settings and log out of all active devices. The buyer can now log in from their device and set a new, secure password.
Expert Advice: Advise the buyer to wait at least 48 hours before posting new videos or running major ad campaigns. The algorithm needs a moment to stabilize the new login footprint (the buyer’s IP and device) to avoid a sudden drop in organic reach.
The Universal “Value Handover Checklist”
To ensure no detail is missed during the transfer, compile a comprehensive handover package containing the following assets:
- Credentials and Access Keys: A secure, encrypted file containing credentials for third-party tools (scheduling apps, editing software, premium stock libraries).
- Domain Name: The domain authorization transfer code (Auth-Code / EPP Code) generated from your registrar (Namecheap, GoDaddy, etc.).
- Source Code and Graphics: Access to the private GitHub repository, Figma files, and shared cloud folders (containing logos, channel banners, and thumbnail templates).
- Standard Operating Procedures (SOPs): Written guides or short video tutorials (such as Loom videos) explaining the daily operations of the asset.
Securing Funds During the Handover
A clean technical migration is worthless if your financial safety is compromised. Never transfer domains, admin access, or databases without payment verification. The use of a neutral escrow service is mandatory. The buyer’s funds are secured in a locked, neutral account. Once you initiate and complete the transfer steps outlined above, the buyer verifies the assets, which automatically triggers the release of the funds directly to your bank account. This framework keeps both parties safe throughout the transition.